Category Archives: Art Tutorials

Venus finished, and an eye painting study.

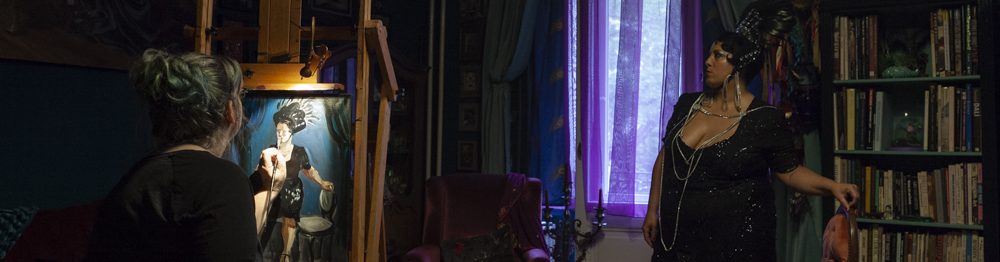
I finished the painting of Bunny just a day after she left, in a sugar-fueled dawn-light sprint.

enus of Wilmersdorf by Suzanne Forbes April 21 2016

Venus of Wilmersdorf by Suzanne Forbes April 21 2016

Although I much prefer to paint my models at night, in electric light, I often finish the details of paintings in as much bright daylight as I can tolerate. While I was working on the details, I remembered a couple of things from when she was here.

As we worked, during the second sitting, Bunny talked about her days with the Glamour-Bombing group. And when she left, she paused in the hallway to take a long look at one of my very few creepy paintings, the one called Chupacabra.enus of Wilmersdorf by Suzanne Forbes April 21 2016

So I decided to give her fey eyes.

Or rather, the brush decided for me, surprising me, and I was pleased.

enus of Wilmersdorf by Suzanne Forbes April 21 2016


enus of Wilmersdorf by Suzanne Forbes unfinished 2016


On the left you can she has a large, centered single highlight on each pupil and on the right, one small and one large on each pupil. You can also see the shadowing of her corneas has increased slightly on the left, making the the highlights seem brighter. This gives the effect that the pupils reflect light the way a cat’s eyes do (which is because the back of their eyeball has this reflective layer called the tapetum lucidum).

Then, because I was still thinking about the “spooky eyes” phenomenon today, I made a couple of eye studies.Suzanne Forbes eye study April 2016


As you can see, the highlight in the “regular” eye is offset to the left and double. In addition, it is placed below the shadow meridian cast by the eyelid. The whites of the cornea are most prominent to the sides of the pupil, while in the “spooky” eye the brightest whites gather below the pupil, emphasizing the reflective property of the eye.

I’m not a fantasy artist, but I thought this analysis, based on the style of old-school horror and fantasy artists like Bernie Wrightson and Jeffrey Catherine Jones, might be helpful!


Let’s talk about skulls.

Your skull? My skull? Anybody’s skull? We’ve all got skulls inside our heads.

Head construction by Suzanne Forbes 2016I’m getting ready to teach a class on drawing faces, and the foundation of the face is understanding the skull. Skulls are beautiful and amazing, and much of how our faces appear is produced by their hard shapes, under our skin. So when I draw people, I start with a construction that represents the hard stuff- the lovely round top and the boxy jaw.

I come from a traditional school of illustration where a system for drawing the figure is always based on a construct, a manikin you build inside your own head. The great drawing teachers of the 20th century, such as Andrew Loomis and Burne Hogarth, each had their own system for creating the manikin. And many basic drawing classes start with the idea of representing the head as the simplest possible form, as a circle or oval.

I’d like to share my personal system for drawing the head, which is based on neither a circle nor an oval.

Head construction by Suzanne Forbes 2016I treat the head as a ball or sphere with a little shape attached- a shape like the box strawberries come in, or the basket you ride in below a hot-air balloon. The ball has a line drawn around its latitude and longitude.

The jaw shape or plate claps onto the front of the ball, like the hinged faceplate of a suit of armor. It attaches halfway down from the latitude line. The longitude line continues down the front of the jaw plate as well.Head construction by Suzanne Forbes 2016

Becoming comfortable with visualizing and rotating a simple construct like this can give an artist much greater confidence in drawing the head.

Head construction by Suzanne Forbes 2016My system also creates placement for the ears, attaching to the head at the latitude line and the top of the jaw plate. I know if I’ve drawn the latitude line curving around the ball carefully and I place the top of the ear along it, the placement of the ear will be believable.Head construction by Suzanne Forbes 2016

The jaw plate creates a surface for the mouth, which is set at the middle of the plate. Its curved surface follows the curve of the sphere, which is very helpful when projecting placement of the mouth in upshots and downshots.

Having a base model as a starting point is also helpful in portraiture. I use it to measure the distinctive features of an individual as well, by the amount they might vary from the base.

I believe you should take what you like and leave the rest, so if my base model doesn’t feel natural to you, why not try Loomis or Hogarth?Head construction by Suzanne Forbes 2016