 This doll scares my husband. Every time he sees it he shudders.
It genuinely gives him the wig.
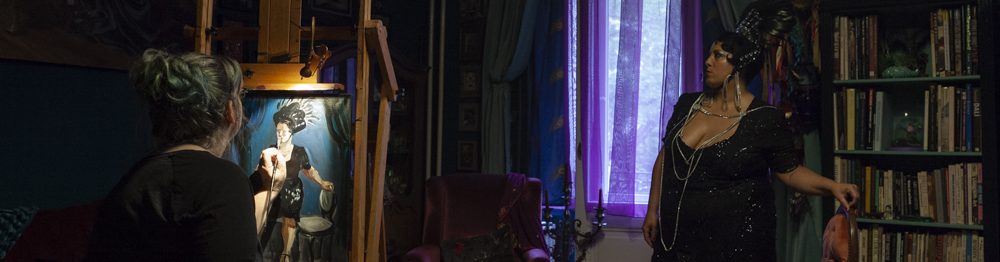
Which is good, right? This is one of the projects I brought in a “project kit” from the Bay Area, in the shipping container.
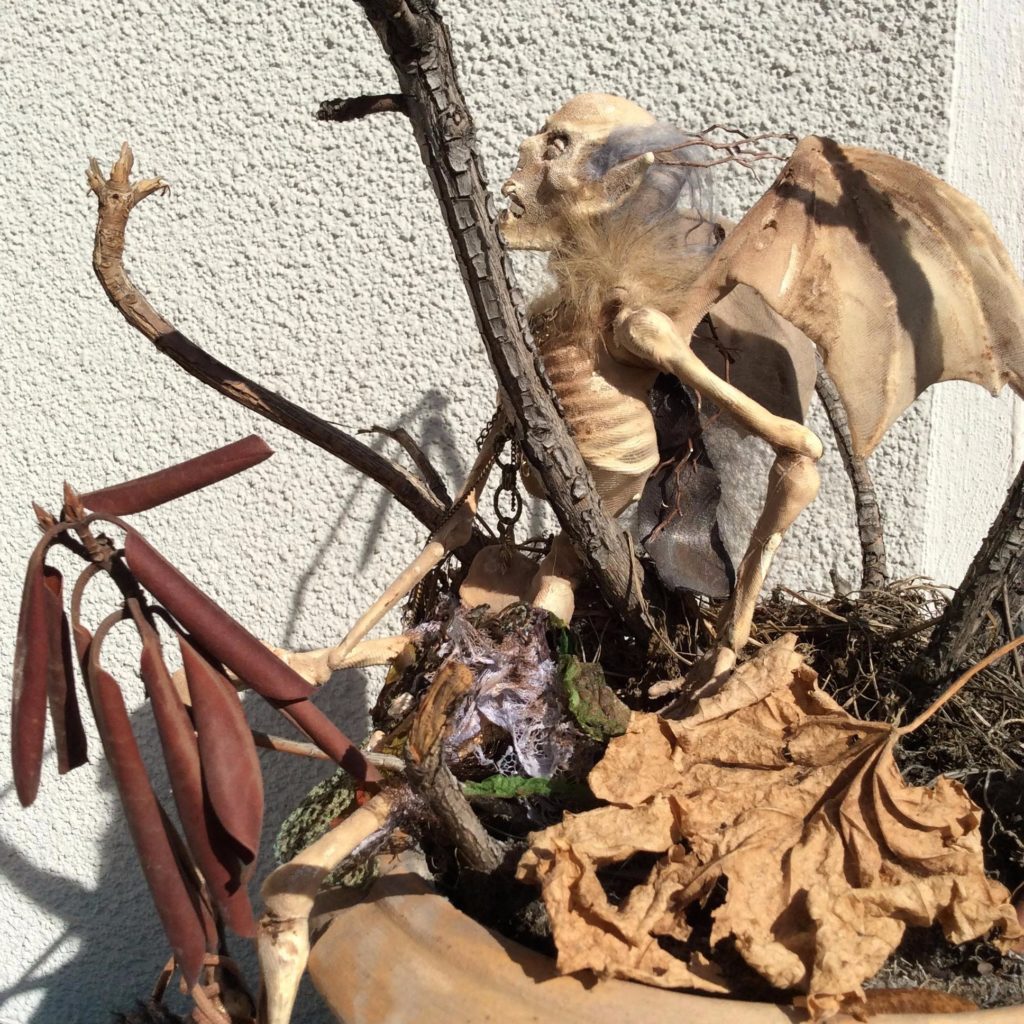
 I had seen this Mummified Fairy tutorial on the excellent, ancient Gothic Martha Stewart site Shadow Manor. You can find loads of Art of Darkness tutorials there.
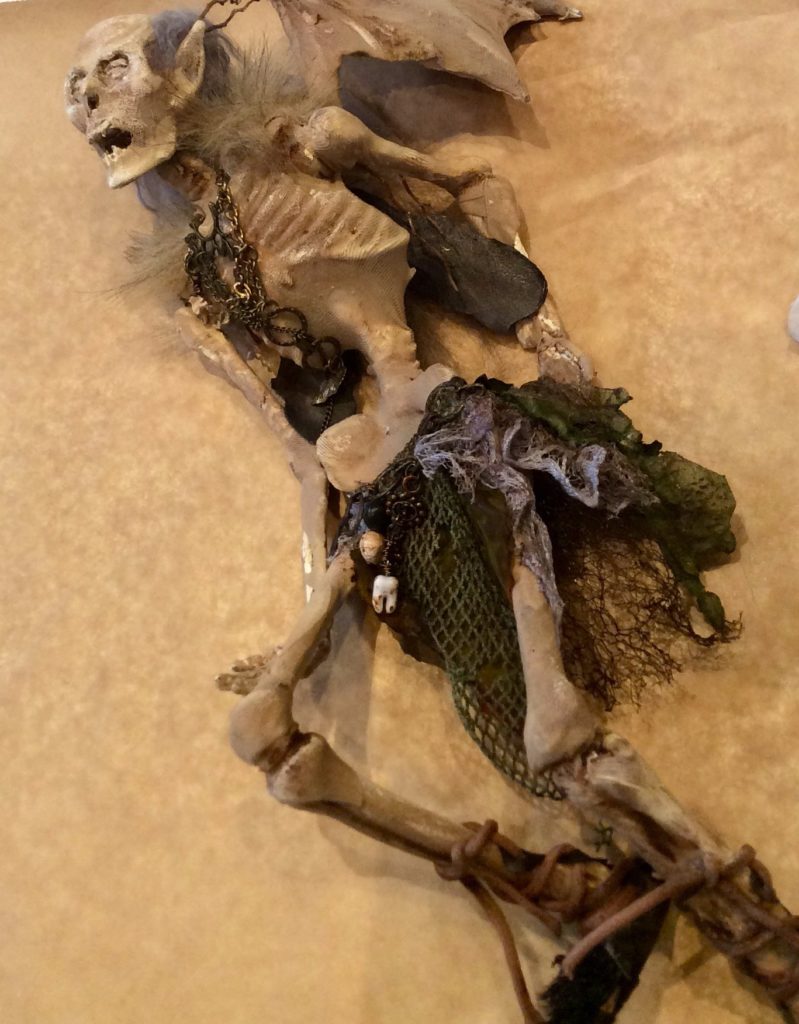
So of course I wanted to make one! My version started out as a cheap 16″ demon skeleton I got for 75% off at Michael’s.
I washed him with soap and water, and used a glue gun to pose him. I cut his spine in half with a hacksaw to give it a realistic curve, added ears made of thin sheet styrene or cardstock (can’t remember), and used globs of glue to give the ears dimension.
I also used glue gun glue and epoxy clay to add some bulk and volume to his joints, because he was a little frail and crappily-sculpted. And to give him a bit of a bump of nose and fangs.
Then I primed him with white spray primer for plastic and sprayed him with matte ivory spray paint.
 And packed him in a box marked “Gothic Rococo Bride of Frankenstein and Fairy Mummy”.
(The Bride became a Gothic Victorian Burlesque tribute to Elsa Lancaster instead).
 Two weeks ago I unpacked him and started revising. His skeleton was still undersized for his head, especially for a skeleton with layers of dried skin. So I added more bulk to his limbs with air-dry clay (cheap but doesn’t adhere well) and used epoxy clay to secure the new, larger knobby joints.
I thickened his shin bones and arms, as well as making his pelvis more solid. I added some clay volume under his rib cage to give the nylon something to stick to there.
I also decided to snip off the demon-y claw tips on his wings, which were a little too goth.
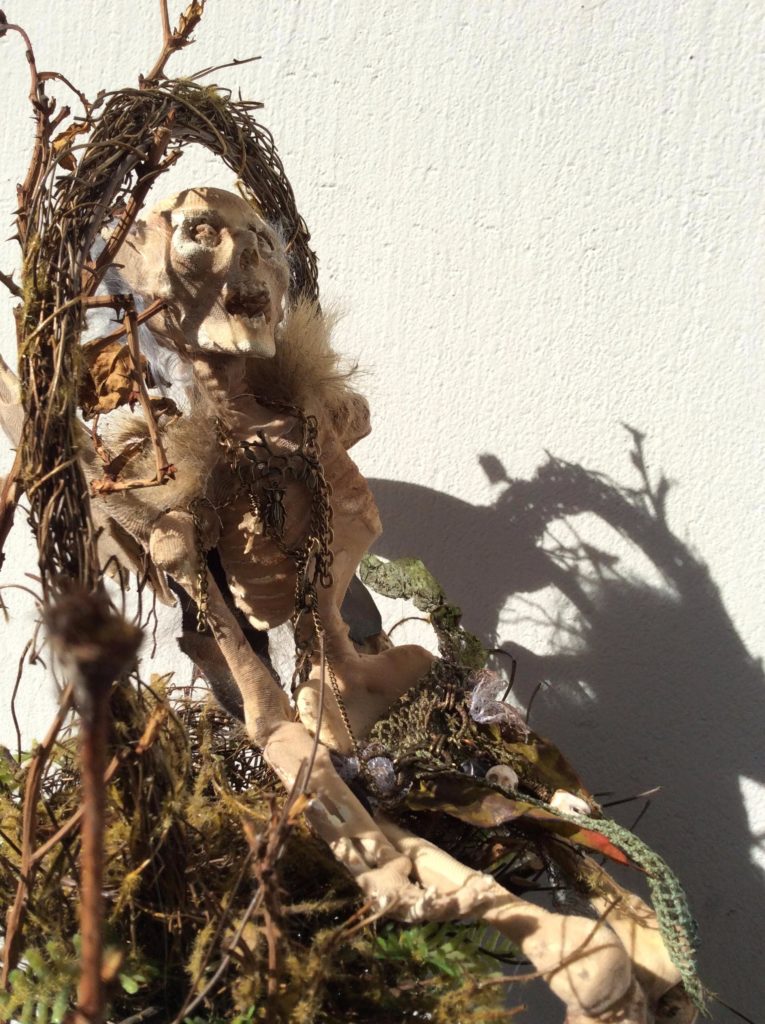
Then I painted over the air-dry and epoxy clay with acrylic in unbleached titanium, which matched the original ivory paint well enough. After that, I added dark shadows at his joints, eye sockets, and so on, using a burnt umber.
I figured the shadows would show through the nylon pantyhose, adding depth, and so they did.
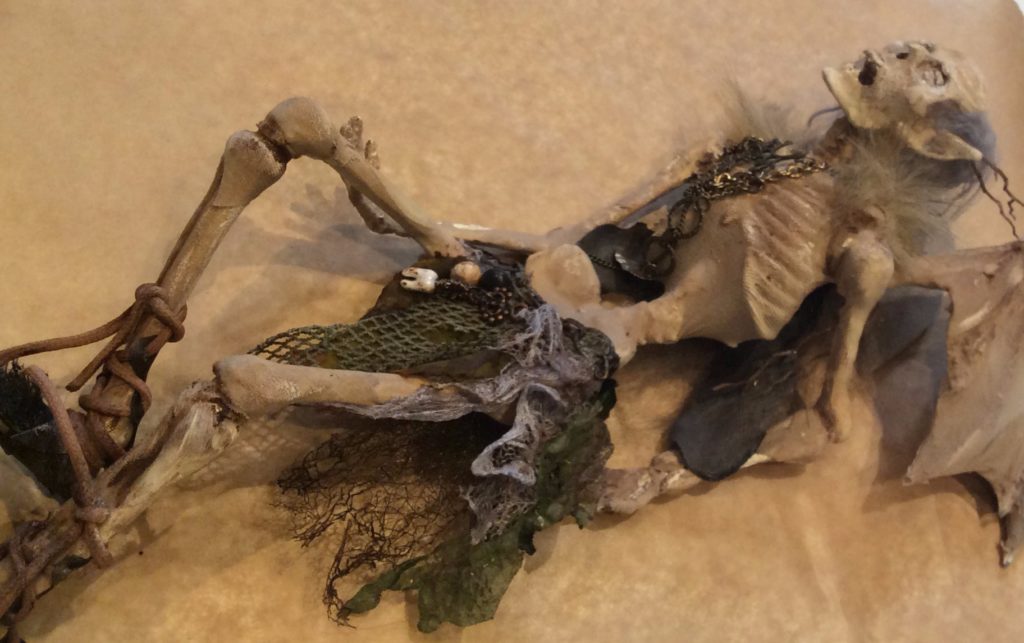 Applying the pantyhose was exciting, in the way that things that must be done quickly and deftly are exciting.
 I used UHU “Extra” alleskleber gel, which is an almost perfect sub for my beloved Quick Grip/Quick Grab, rather than contact cement. I really should have followed the instructions and applied the pantyhose while the skeleton was disarticulated.
But I never follow the instructions for anything. So I had to do the gluing and stretching to fit over sections of the figure in situ.
The instructions say to cut the pantyhose into 12″ lengths; I wound up cutting it into roughly 5″ x 5″ pieces. The pantyhose adheres beautifully to the primed and painted skeleton, almost melting on- the first time.
Once it is saturated with glue and the glue has dried, it resists bonding, so get it right the first time. I looked at his eye sockets with the nylon stretched across them and decided he needed eyelids. I sculpted sunken eyeballs with lids out of epoxy clay, cut holes in the nylon, and pressed them in.
In the end I had some places where the pantyhose didn’t lie smoothly or wrinkled in a way that looked much more like pantyhose than desiccated skin.
I simply decided awkward areas would be covered with something in the finished piece.
And that was how he became a dressed doll with a breechclout and jewelry, and wisps of grey Tibetan lamb hair from this one piece I got at doll supplier/educator supreme MorezMore and have used for some two dozen projects. (The site’s mistress is currently engaged in a fascinating project of using stop-motion armature for a humanly-posable doll experiment!) I rifled through my fabric stash and found lots of scraps. I layered scraps of fabric, fiber, silk leaves and lace for his breechclout.
Then I got out my findings bins and made a kind of creepy chatelaine to secure it. And I made him a kind of neck piece with mixed metals that was influenced by Celtic torques and Maester’s chains.
I decided to make him lace-up shoes to cover some of the awkward patches on his shins.
 I got the concept from some pins posted by my friend Alexis about to how to make Medieval shoes.
I envisioned a pattern, cut it out of leatherette and used my cuticle nippers to make sloppy holes in the the sole/back pieces.
Then I just glued the sole parts onto the bottoms of his feet and laced them up with a tan shoelace from a scrap bin.
I bought some granny boots a while back that came with tan laces; I promptly replaced them with black laces but saved the rough tan ones for… something. There was a tiny bit of black fur left from when Daria gave me a personal doll-wig-making workshop and I used that on top.
I did a little dry-brush distressing and shadowing on the nylon-covered fairy, accenting the hollow places and joints with more umber.
I also highlighted bony areas like his zygomatic arch with unbleached titanium. This was easier to me than re-spraypainting him as suggested, considering that would have required going out and getting some taupe spraypaint. I don’t really like anything to slow me down when I’m making some damn thing. I painted his eyelids to match his skull at the same time.
I had burned and melted and snagged the fabrics I used, to distress them and make them raggedy, but it wasn’t enough to knock back their color into the same taupe/ivory family as the skeleton. So I dry-brushed and distressed those too, til they faded back into his palette.
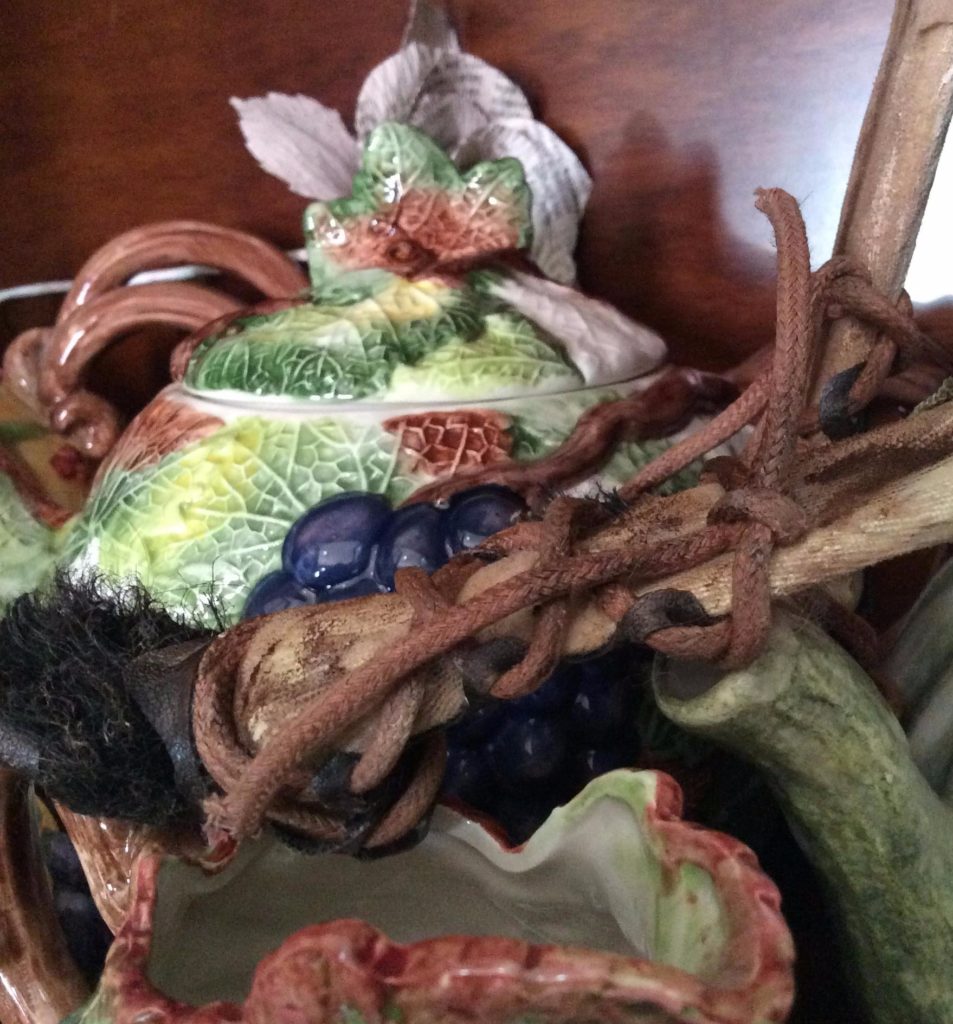
Here he is posing with some bones i made out of Model Magic, the incredibly lightweight air-dry craft clay made by Crayola.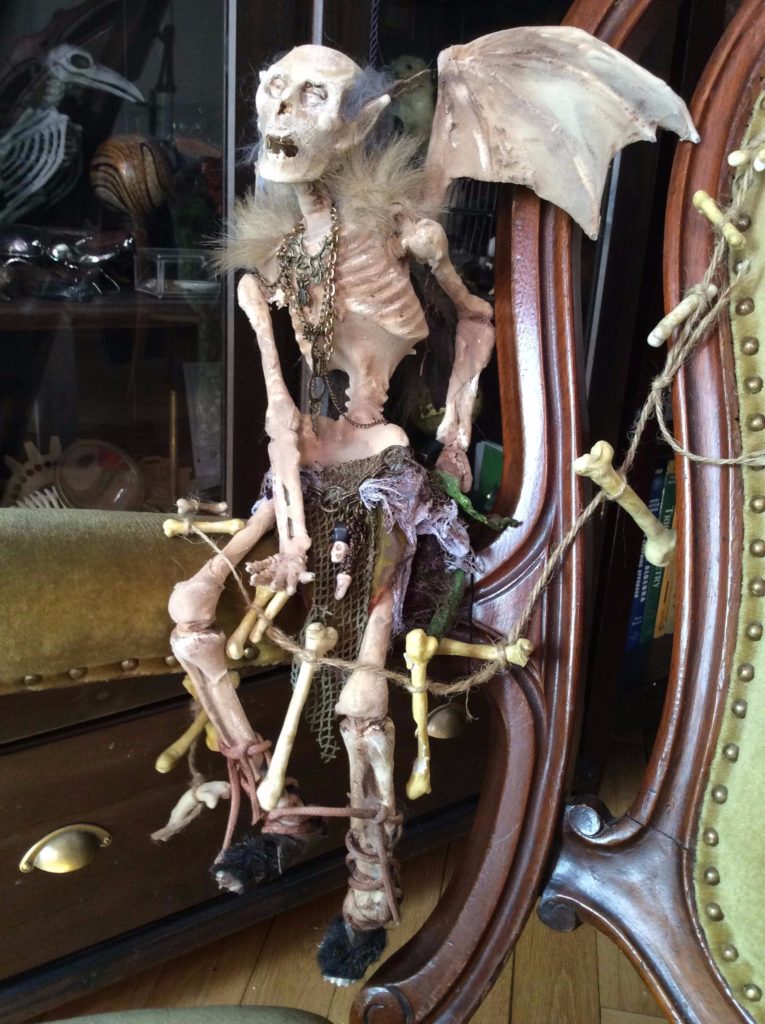
The bones are sculpted over Q-tips, and were made in 2007 for a Hubba Hubba Revue, maybe Flintstones themed? I soaked a paper towel in thinned ochre paint and wiped it over them. I don’t even know how they got in the shipping container.
Eventually I’d like to have some kind of Lady Cottington’s Pressed Fairy style shadow box or specimen case for him, but for now he’s living amid my majolica in the library china cabinet. Hub will never notice him there. Although if he does, he might jump.
He’s gorgeous! I love the slack jaw and sunken eyes.
Oh my gosh! Thank you so much!!!!
I’m with Dan on this one. Will you hide him when I come to visit?
Ha! Yes, I will hide his creepy little face:)
Pingback: Snow Queen OOAK Doll with sledge and reindeer, finished! - ChipInHead.com
Pingback: Huge bead embroidery project finished: my Green Woman bead embroidered corset. - ChipInHead.com
Pingback: A dollhouse maid upgrade for the Beetlejuice fashion revival! - ChipInHead.com